DOCOVA User Quick Start Guide
This It is NOT an installation, technical or administrative guide. This is a Quick Start Guide. It is intended for DOCOVA Users looking for an introduction to basic DOCOVA concepts, features and functionality. This document assumes you are running the current version of DOCOVA. If that is not the case, some of the images you see below could be different, however the concepts remain the same.
Table of Contents
- Terminology
- User Interfaces
- System Applications – Dashboard
- System Applications – Libraries
- System Applications – Search
- Custom Applications
Terminology
Before we begin, lets ensure that we understand each other. DOCOVA is a Platform that is used to Create and Manage Applications. This is different from a File System that you access with Windows Explorer on a PC or Finder on a Mac. Those types of systems manage Files, such as Microsoft Office Word and Excel files, PDF files or AutoCAD drawing files. In DOCOVA the content is typically much more than just a file. It can include Meta Data, Workflow, Embedded Emails, Comments, Links and much more.
Applications in DOCOVA can be either System Applications or Custom Applications. System Applications include Libraries, the Dashboard, Search, Administrator, Designer and App Builder. Custom Applications could be almost anything, such as a CRM, Invoice Tracking application or a Process Automation application.
There are two general groups of people who can use DOCOVA, Administrators and Users. Administrators can be Global Administrators, or Library Administrators. Global Administrators have full access to all the features, functions and settings associated with DOCOVA. Library Administrators have full access to create, configure and manage Libraries. Users can create and edit information as determined by an administrator. It is possible for a Library Administrator to register Users to a Library and these users can be internal or external to the company.
User Interfaces
DOCOVA can be accessed using a variety of devices. Although we touch on these in this document, we will focus primarily on the browser interface. DOCOVA supports all of the common browsers, including IE, FireFox, Chrome, Safari and others.
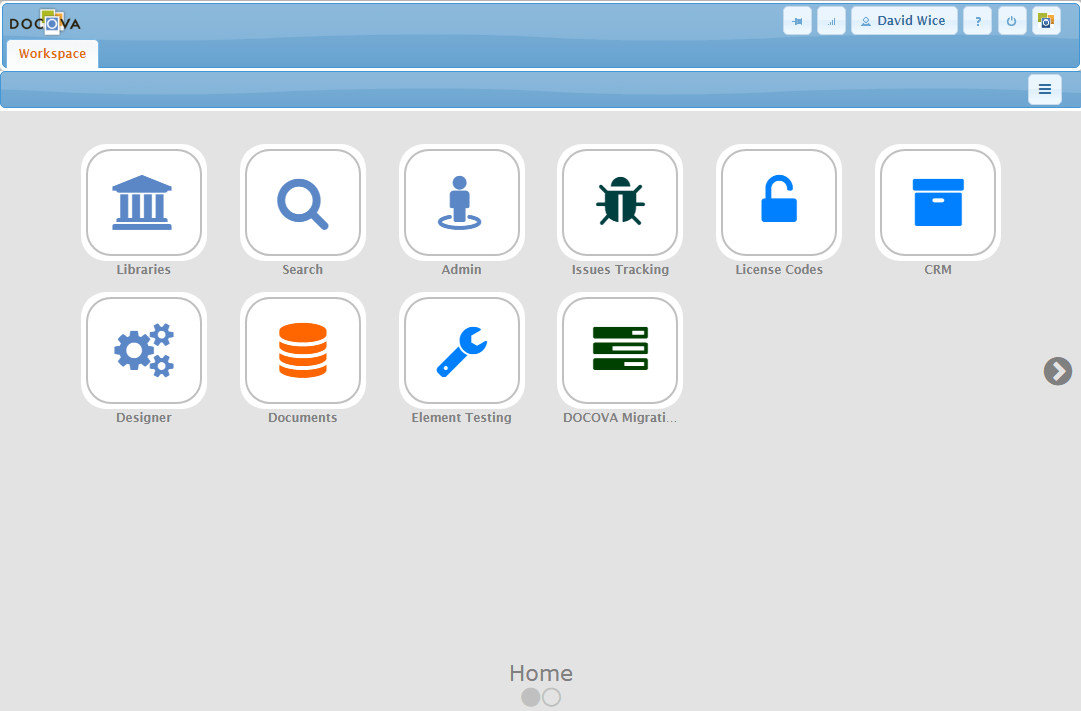
The DOCOVA Browser Interface is a tabbed interface. When you first open DOCOVA, you will see the Workspace Tab. Additional tabs appear as other applications are opened. The Workspace is where users can organize their Applications. These can be System Applications or Custom Applications and can be added or removed by selecting the Options Button. The Applications reside on Panels, such as the Home panel in the example below, and a user can create as many Panels as they like.
User Controls are located at the top right of the screen and will give you access to your User Profile, the Help page, Logout and the About DOCOVA page which includes information such as the DOCOVA Version. The Push Pin icon allows you to Save the Interface configuration so it will load up with your changes when you restart your browser. Note that all information in DOCOVA adjusts based on the permissions assigned to the user when they log in. The image below shows the Workspace.
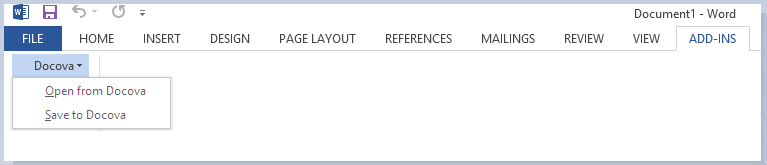
DOCOVA has a Menu Add In for Microsoft Office. Users can “Open” or “Save” files from or to DOCOVA using this menu. The DOCOVA menu is available off of the ADD-INS tab in the office application.
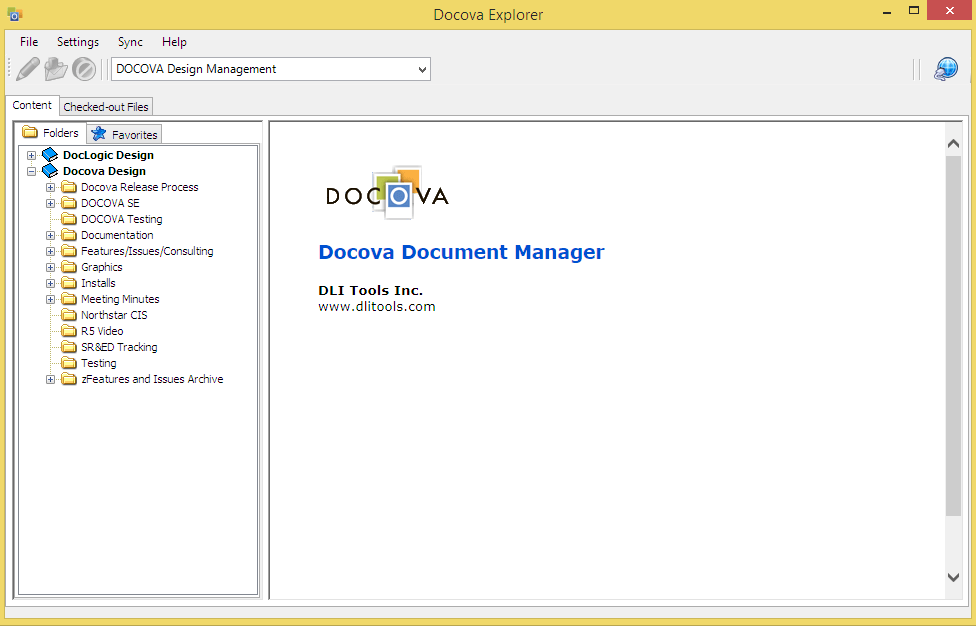
For Windows users, we have the optional DOCOVA Explorer Plugin where users can create new documents, browse the folder structure for existing documents, and much more without having to open a browser. DOCOVA Explorer is also referred to as DOE. DOCOVA is a Zero Footprint product, meaning you do not need software on your local machine to use it. However, you Must Have DOE Running if you want to access more advanced features such as the ability to Drag and Drop Files, Open and Save from Microsoft Office (above), or Integrate With Other Applications.
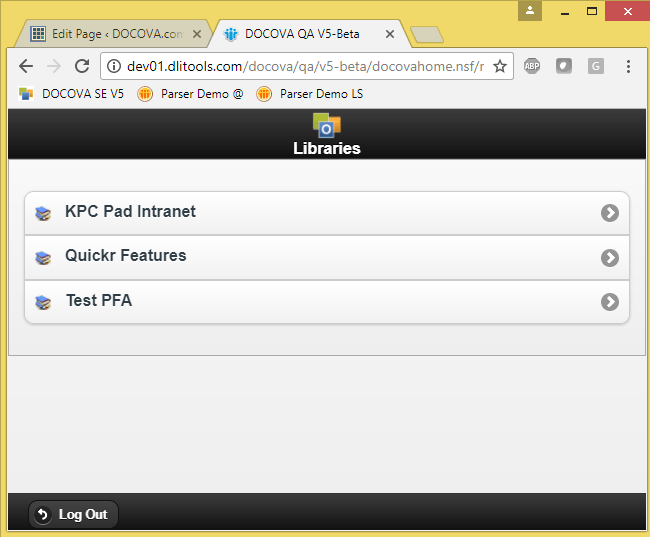
There is also a limited function browser interface that we call DOCOVA Lite. It can be accessed by appending “/mobile.htm ” to the end of the address used to launch a DOCOVA instance. (eg ../DOCOVAHome.nsf/mobile.htm) DOCOVA Lite has a Simplified Interface for accessing content stored in Libraries, and may be easier for the casual user to work with compared to the full browser interface.
If you go to Google Play or the Apple App Store and search for “DOCOVA” you can find and download our Android and iOS clients. These are similar in appearance to DOCOVA Lite but they run native on the mobile device. Note that on an iPad the full web interface is available via the browser.
You can also Access DOCOVA From the File System. You can either Sync information to your computer using the DOCOVA File Sync feature, or connect to DOCOVA from the file system using DOCOVA File Jockey add-on.
For more information on available interfaces, contact your system administrator.
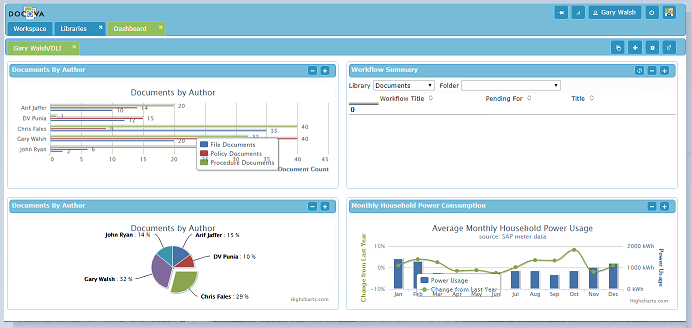
System Applications – Dashboard
The Dashboard is a grouping of windows of information that you can configure to display content that is internal or external to DOCOVA. Each grouping is called a Panel. The Dashboard Controls will allow you to create a new Panel or make changes to an existing Panel. The Panel Controls will allow you to determine the nature of the content that goes into each of the panels. This content is fed by something referred to as a Widget.
In some cases you can create the Dashboard layout or it may be created by someone else and you simply Share it.
System Applications – Libraries
Libraries are content repositories. When you click on the Libraries System Application a new Tab will open and a list of libraries will appear along the left of the screen. Libraries contain content that can be organized using Folders and Sub Folders. The content is displayed through a Document, and the Documents are organized in Folder Views, also referred to as Perspectives.
While in the Libraries Application on the far left of the interface you will see a Folder Control. This is similar in appearance to what you are used to seeing with the file system on your computer. Libraries that you have access to will be shown in bold, and you can expand them to see content stored in Folders and Subfolders using the + and – symbols.
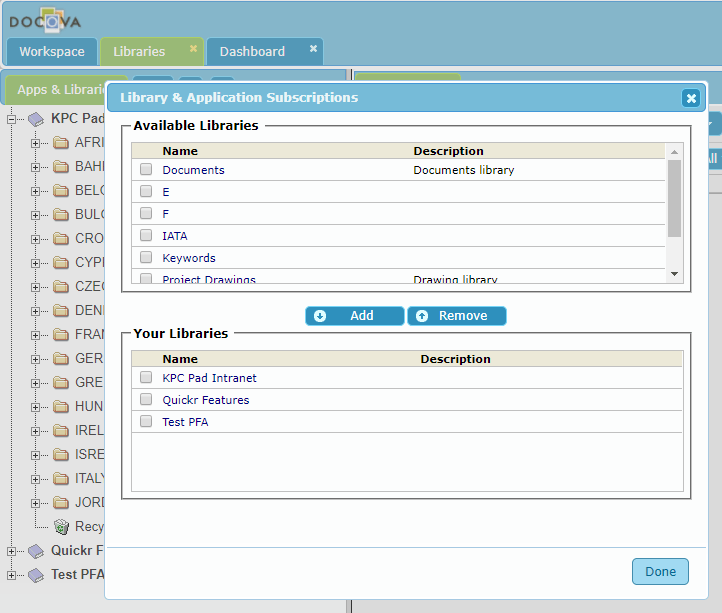
Just because you have access to a library does not mean it will be visible, as the folder control only shows Subscribed Libraries. To Subscribe or Unsubscribe to a library click on the ![]() button at the top of the folder control. A dialog will appear that will allow you to add and remove libraries that you have access to.
button at the top of the folder control. A dialog will appear that will allow you to add and remove libraries that you have access to.
Working with Folders and Subfolders
As mentioned before, DOCOVA Libraries are in some ways similar to your computer’s file system. The Folder Control includes a hierarchy of Libraries, Folders and Subfolders. You can expand or collapse the Folder/Subfolder hierarchy by clicking on the “+” and “-” signs. If you click on a Library itself you will see a History of what has happened in that Library.
Depending upon the rights that have been granted to you, you may be able to create and manage Folders and Subfolders. If you Right Click on a folder or subfolder, a context sensitive menu will appear. This will list all of the options.
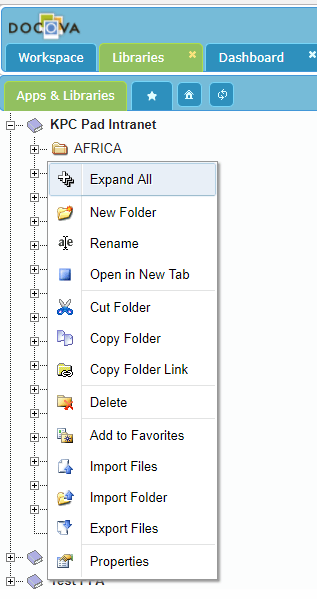
To add a new folder, right click and select New Folder from the menu that appears. Add the folder name and click OK to save the folder. If the folder you are creating is a Subfolder, it will Inherit the characteristics of the selected Parent Folder when the Subfolder is created.
Note that the Administrator will determine who can create Folders and Subfolders in a library. You will see a notification if you do not have the rights to perform certain operations.
Creating Documents
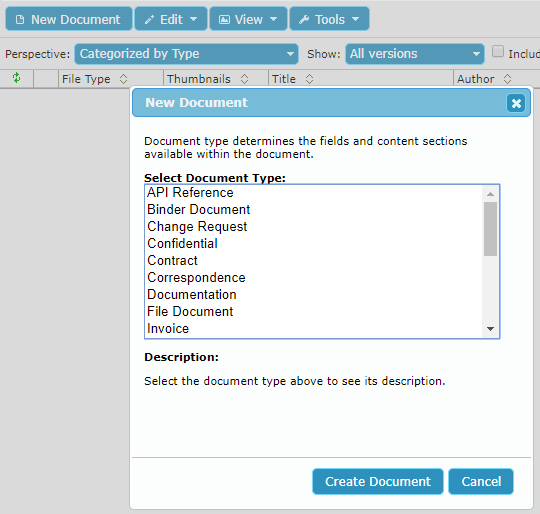
To Create a Document in DOCOVA from the browser click on the New Document button located to the top left of the content pane. If only one document type is allowed in the folder the name of that DocType will appear on the button. If more than one document type is allowed then a dialog will appear after you click on New Document that allows you to select the type of document you would like to create.
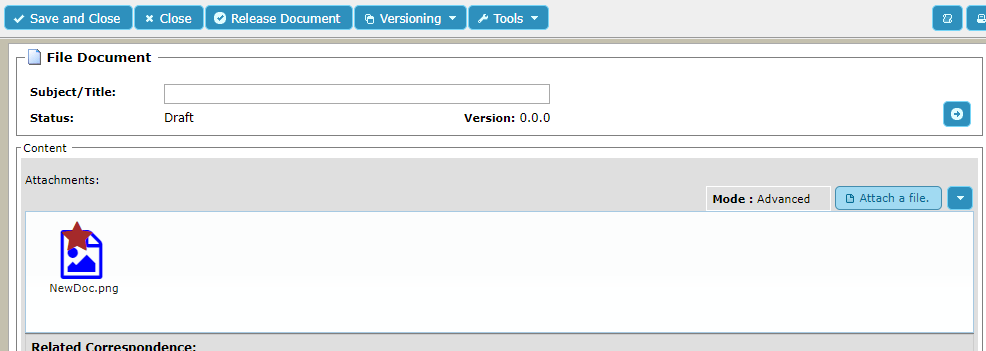
After selecting the DocType you can enter content. A DocType can be configured with a wide variety of features, including the ability to Upload a File Attachment. After you have added your information to the document, if you select Save & Close the document will be created and saved in a DRAFT state. Unless the Administrator has made a change to the folder security, only you will be able to see that document if it is in the draft state. If you select Release Document, it will be released on the system for other users to access. (Note that the exact functionality of your documents may differ from above depending on the settings in the DocType)
If the document has Workflow associated with it you will see a Start Workflow button. The Release Button will appear again once the document has gone through its workflow process.
To Create Several Documents at the Same Time you have a few options:
- Use the Tools/Import Files option (requires the DOE Plugin)
- Drag and Drop Files & Emails to DOCOVA Explorer (requires the DOE Plugin)
- Drag and Drop Files & Emails to a Folder in the Folder Control, or to the perspective area of an open Folder.
- Drag and Drop Files to DOCOVA using WebDAV (requires File Jockey)
To use the Tools/Import Files Option navigate to the Library/Folder/Subfolder where you wish to create your documents. Select Import Files from the Tools Menu.
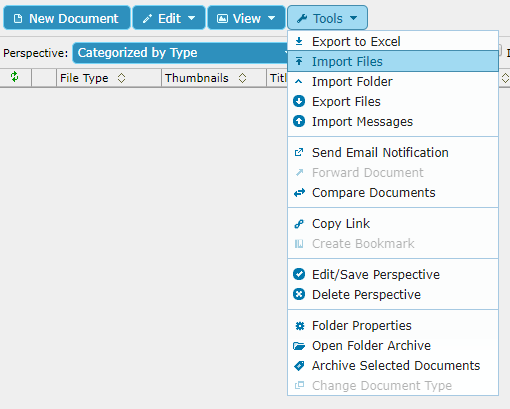
A dialog will appear that will allow you to locate your files from the file system. You must select Add Files to select the files from your file system, select the Document Type you wish to use to import the files, then click on the Finish button.

You can also create documents by Dragging and Dropping Files into DOCOVA Explorer (DOE). First ensure you have DOE Running. If DOE is NOT running the DOE Icon in the upper right of interface will be RED, and you will need to either start DOE from the Windows Start menu, or if you do not have DOE installed download and install it from the DOCOVA About Icon. Depending upon the access your have to your computer, you may need assistance from your system administrator to do this.
![]()
To create a new document Open DOE and then Navigate to your File system in Windows Explorer. Select the Files you want to import and then Drag and Drop them onto the Folder in DOCOVA where you want them to be created. Note that you cannot drag and drop entire folders, only files. If you want to import a folder structure you can do that using the perspective Tools – Import Folder menu option, the Folder Control Import Folder option, or DOCOVA File Jockey as outlined below.
To Drag and Drop an Email into DOCOVA navigate to the folder in your email client that has the email. Drag and drop the email to the target DOCOVA browser folder or a folder in the DOE client. You may be prompted to select the document type or not, depending on the available DocTypes for that folder. Note that some email clients require additional plug-ins to support drag and drop.
You can also create multiple documents at the same time by Dragging and Dropping them into a WebDAV mapped drive using DOCOVA File Jockey. This requires that File Jockey be enabled and that you have mapped a drive to DOCOVA. Talk to your system administrator to confirm these tasks have been performed.
Once File Jockey is enabled you can Drag and Drop Complete Folder Structures into DOCOVA from Windows Explorer.
Editing Documents
To Edit a document double click on the document in the folder view, then click on the EDIT button from the menu, or you can right click on the button in the folder view and select EDIT from the menu that appears. If you do not see an edit button then you do not have the required access to perform that operation.
Document Security
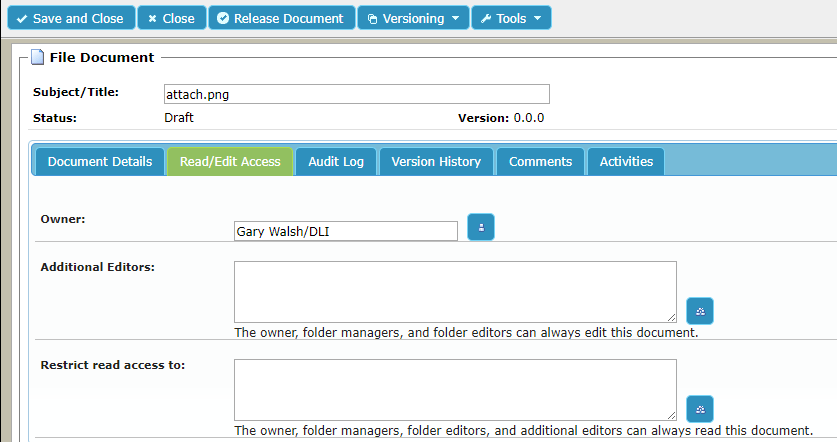
As the creator of a document you are considered the Document Owner, unless some form of customization has changed that. It is therefore up to you to determine who else can read or edit that document. To do this, open the document and expand the More Section by clicking this button ![]() which is located at the far right of the document.
which is located at the far right of the document.
If you allow other users to Read or Edit a document that you own, but they cannot see it when they go into DOCOVA, this may be because of the state of the document and/or the settings in the Folder and DocType. Contact your system administrator if you require assistance.
Folder View Perspectives
A Folder View allows users to look at several documents at one time by displaying them in a grid. Columns pull information from documents so you can determine what they are without having to open them. For example, if working with legal documents, it may be advantageous to create perspectives so you can look at them by the Client Number, by the Matter Number, or by other types of Meta Data that exist on the Document Type. Folder Views are also known as Perspectives, and can be easily adjusted by a user to meet their needs.
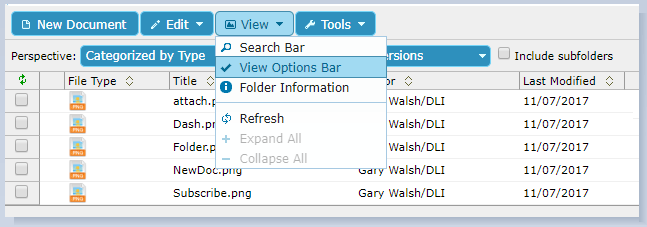
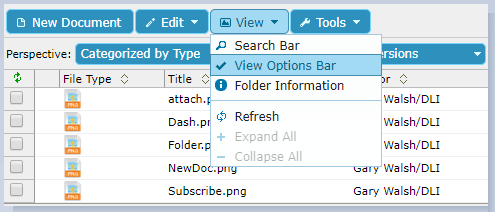
Before you begin, ensure that the View Options Toolbar is turned on. You can do this by clicking the View Options item from the View pull-down menu.
Every folder has a default System Perspective that will appear unless another has been setup. Users can change this default perspective to another one by clicking on the Perspectives Dropdown. Administrators can create new perspectives that are available to all users and save them into the list.
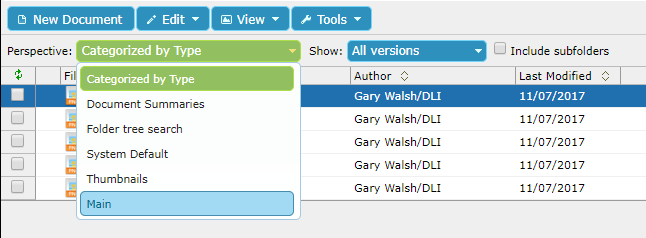
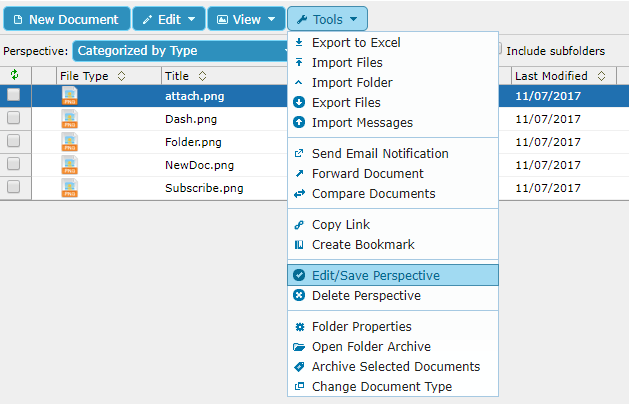
A New Perspective can be created by right clicking on the column headings and adding or removing columns, changing the column properties, or categorizing and sorting. If you have rights to do so, you can then select Tools – Save the New Perspective.
If as a user you define a new perspective keep in mind that when you navigate away from a folder and then return to it your changes will be gone. Only Administrators can save a perspective for others to use.
System Applications – Search
Although it is possible to manually search for documents by navigating through libraries, folders, subfolders and associated folder views, it is much more efficient to search for documents using the DOCOVA Search Engine. Searching is done by:
- typing in a Search Query
- using the Advanced Search
- using a Saved Search
Each of these techniques is available within a folder (and its associated subfolders) and across libraries.
To search within folders and subfolders, first ensure that you have enabled the Search Option Toolbar at the top of the content pane. You can do this by clicking the Search Bar item off the View pulldown menu.
The Search For: area (see the image below) will allow you to type in a search query to search on, build a query using the advanced search, save a search, clear search criteria or delete a saved search. In you select the Include Subfolders option the search will include the subfolders below the parent folder you defined the search on.

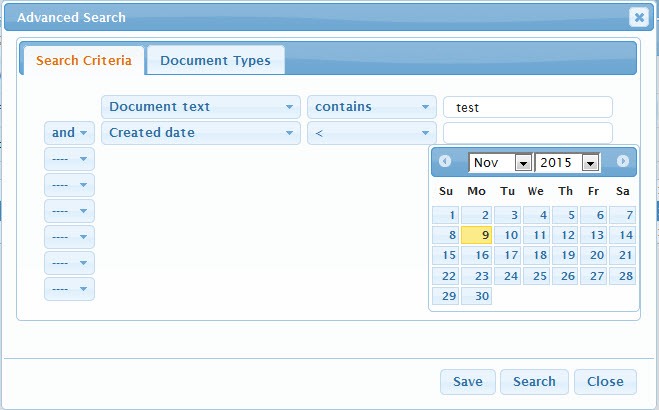
If you select the Advanced Search option, you can search by Meta Data fields or by the Document Type. If you search by the Meta Data fields you specify these by selecting the field name and the operators “and” or “or”.
Once you perform a search by clicking the Search Button the search results will appear in the folder view based on the perspective you have selected. Note that you can quickly Export to Excel by clicking that option off the Tools menu. If the search query you build is something you may need to run again, you can Save your Search by clicking on the Save button.
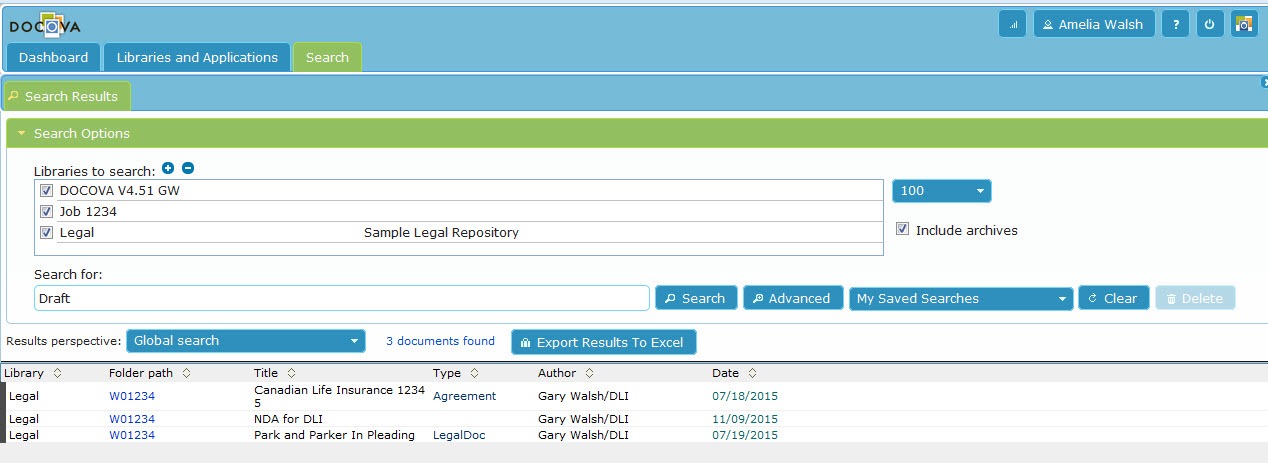
With DOCOVA you can Search Across Libraries using the Search System Application. The options are similar to those you saw when searching folders and subfolders, only now you can specify what libraries you want to search across. Again you can type the query, used the Advanced Search to search by Meta Data or DocTypes, and save your searches. You can also include Library Archives in your search.
Custom Applications
DOCOVA allows you to build applications to suit your specific needs using App Builder. From a user point of view, the navigation, features and functions are defined by the creator of the application. For more information of the creation of custom applications refer to the DOCOVA Administrator Quick Start Guide.